Export/Restore Configuration
Export Configuration
The current system configuration can be downloaded as a plain text file. It contains all configuration performed via the WebUI and the ogcli tool. It does not contain log files, user scripts, docker containers, service configuration or other files stored via other means.
The exported configuration may be useful for:
-
Disaster recovery.
-
issues with system upgrades.
-
unexpected configuration changes.
-
-
Replacing devices after RMA.
-
Configuration templating.
Export Configuration via WebUI
CONFIGURE > SYSTEM > Export / Restore Configuration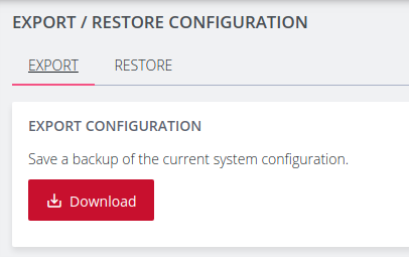
To export the system configuration, click the Download button and save this file. Sensitive data such as passwords and tokens will be obfuscated in the configuration export.
Note: The default filename includes the system hostname and a timestamp. For example, cm8148_20210910_config.txtem8000_20210910_config.txt
Export Configuration via ogcli
The system configuration can also be exported using the ogcli tool.
As an administrative user, run the following command:
ogcli export <file_path>
Control The Export Of Sensitive Data
The display of sensitive data during export via ogcli can be controlled by modifying the ogcli command:
-
To display secrets in cleartext, run:
ogcli --secrets=cleartext export <file_path>
-
To display obfuscated secrets, run:
ogcli --secrets=obfuscate export <file_path>
-
To display secrets masked with ********, run:
ogcli --secrets=mask export <file_path>
Caution: Configuration exported with --secrets=mask cannot be used to import configuration.
Restore Configuration
An exported system configuration can be imported to the node using the WebUI or ogcli tool.
Note: If the configuration was exported using --secrets=mask, it cannot be used for configuration import.
Note: It may take up to ten minutes to import a config file with a large amount of configuration.
Restore Configuration via WebUI
Importing configuration using the WebUI will use the restore strategy. Restoring configuration will override all settings on the node.
Only configuration from the same version and model can be restored.
To restore the system configuration:
-
Click the Restore tab
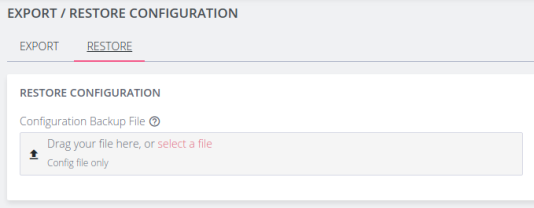
-
Select the configuration file to import.
-
Review the configuration by clicking the arrow to display the file content.
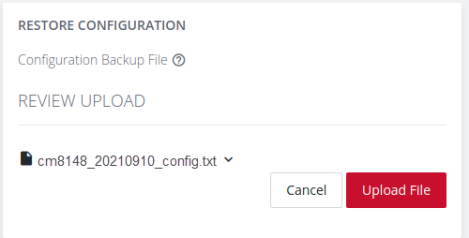
-
Click the Upload File button to start the import process.
-
A green banner will display when the configuration import is successful.
Import Configuration via ogcli
The system configuration can also be imported using the ogcli tool. Either the import or restore strategies can be used.
Import Configuration
Configuration that is imported using the ogcli import command will be merged with the current system configuration, preserving the current values, and adding missing entries from the exported configuration where required.
As an administrative user, run the following command:
ogcli import <file_path>
Restore Configuration
Configuration that is imported using the ogcli restore command will replace the current system configuration. The resulting system configuration will reflect what is in the exported configuration.
Note: Restoring a configuration file may take up to three minutes for large files.
As an administrative user, run the following command:
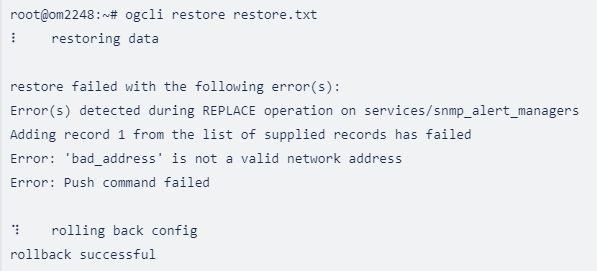
ogcli restore <file_path>
Automated Rollback To Working Configuration
'Config Rollback' provides an automated rollback mechanism that ensures a device will automatically revert to its last known working configuration in case of a failed restore. Automated Rollback is the default configuration of this feature and cannot be overridden or configured for manual operation.
Rollback maintains operational stability, ensuring the system does not become partially upgraded due to some error during upgrade. The ability to roll back to a previously safe configuration minimizes downtime and service disruption, making it a vital addition to the system's resilience.
Rollback behavior in the event of a detected restore failure:
The system automatically detects a configuration update failure. Upon detection of a failure, the system automatically initiates a rollback to the last known working configuration without user intervention until a known working configuration is successfully installed.
Updating the Import/Restore File
The import/restore file must follow a very specific format; deviation from format should be avoided. Comments and blank lines are allowed but any commands not starting with either ogcli or config need to be in proper heredoc format, see the below example (note the <<'END' format, this is the only heredoc marker allowed).
Note: Inline comments will not work.
config replace system/session_timeout <<'END'
cli_timeout=0
serial_port_timeout=0
webui_timeout=20
END
Rollback Capabilities
-
When the system initiates a rollback, it will log to syslog, print a message in the CLI and display a pop up “toast” notification in the WebUI.
-
This system is resilient to network issues; once Rollback is started it will continue without the user being connected to the network.
-
If a user sends a ctrl-c signal during restore/import the system will also begin a rollback.
-
If a user sends a ctrl-c signal during the rollback it will be ignored. This is to ensure that the system does not enter a bad state.
-
Users cannot start another restore/rollback if there is already one running on the system, a warning will be issued.
Rollback Limitations
-
Config diff and Rollback can be used by any user with Administrator permission and access to the shell. It is initiated via the WebUI or command line.
-
Only one import/restore and rollback is permitted on the box at once.
-
Rollback cannot be initiated without a failing import/restore.
-
Rollback cannot be initiated to a specific version.
-
Rollback does not support manual intervention and once rollback is initiated it cannot be stopped.
-
Rollback cannot be initiated once import/restore is complete.
Lighthouse Node Backup
Configuration export can be scheduled to be performed periodically using the Lighthouse Node Backup feature.
For more details, consult the Lighthouse User Guide: https://opengear.com/support/documentation/