Creating an Enrollment bundle
To create an Enrollment bundle in a Lighthouse instance:
-
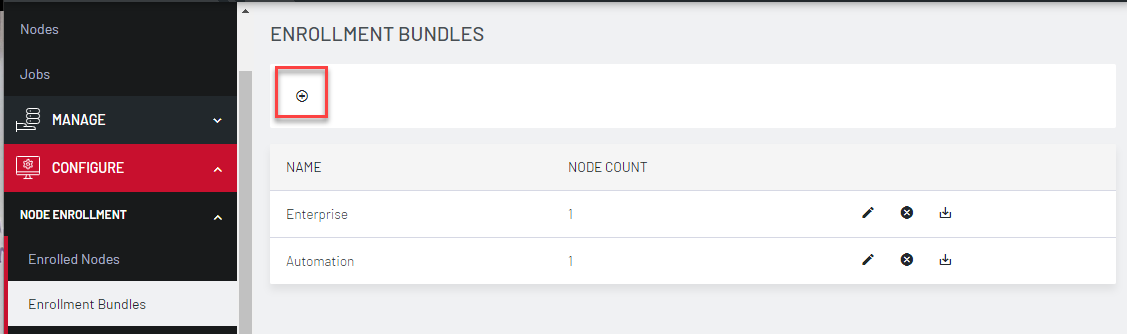
Select CONFIGURE > NODE Enrollment > Enrollment Bundles
-
Click the + button. The Enrollment Bundle Details page displays.
-
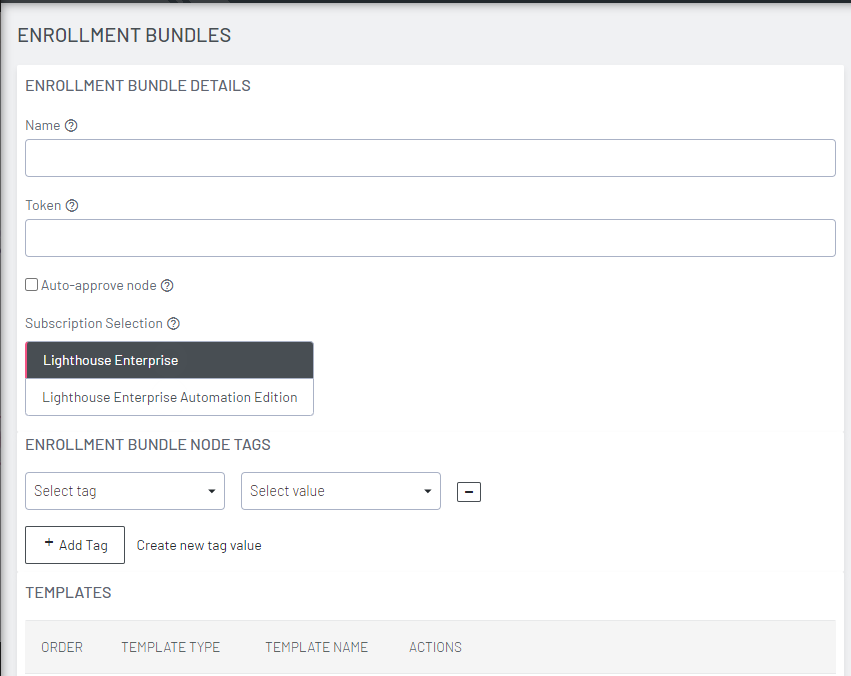
Enter a Name and Authentication Token for the bundle in the respective fields.
-
Select the number of Tags and Values to apply to any nodes that enroll using this Enrollment bundle.
-
(Optional) Select the Auto-approve node checkbox.
When this is checked, a device configured using this Enrollment bundle is not placed in pending mode during the Enrollment process. Instead, it is automatically approved for Enrollment after it has been identified. -
Select the desired Subscription Bundle Label - Lighthouse Enterprise Edition or Lighthouse Automation Edition.This is the desired subscrption type to assign to newly enrolled nodes using this bundle (optional when more than one subscription is active on the Lighthouse).
-
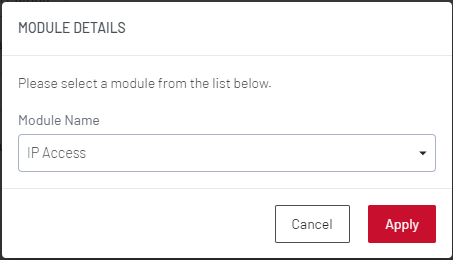
You can also use this bundle to automatically activate NetOps modules for any supported nodes. Scroll down to the NETOPS MODULES section and press the + button to open the MODULE DETAILS dialog.
-
Select the desired Module Name from the drop-down list. Click Apply.
With the Enrollment bundle named, use the Enrollment BUNDLE NODE TAGS to populate it with the desired name-value pairs:
-
Select a field name from the left-most drop-down menu.
-
Select or enter a value from the right-most drop-down menu.
-
Click the + button to add a new pair of drop-down menus.
-
Select another field name and select or enter another value.
-
Repeat until all desired name-value pairs are displayed.
-
Click Apply.
With the Enrollment bundle named, use the TEMPLATES to populate it with the desired list of templates to be applied post-Enrollment:
-
Click the + button to add a new pair of drop-down menus.
-
Select a value from the Template Type menu. The selected template type filters the available names to those templates of that type.
-
Select a value from the Template Name menu.
-
Repeat until all desired type-name pairs are displayed.
-
Click Apply.
The templates in the table can be reordered using the arrow buttons in the far-left column of the table and are executed in the order they appear. The order buttons appear if there is more than one template in the table.
Template push operations stop if one template fails.