UI-based WorkFLow
Each NetOps Module provides a simple web UI for configuration and status monitoring. This UI is designed primarily for manual operation, evaluation and testing. For comprehensive automation, refer to the CLI-based workflow section that follows. It may be useful to familiarize yourself with the system using the UI before adopting a CLI-based workflow.
Note: Changes pushed to nodes via the Lighthouse UI or API will override those made by direct repository access, therefore UI- based or CLI-based workflows should be considered mutually exclusive modes of operation.
UI WorkFlow
Launch an HTTPS browser session to Lighthouse.
Login using root and the secure password set earlier.
Tip: You may also login as a Lighthouse Administrator user, if you have one configured.
Create Device Resource Bundle
-
In the menu, navigate to CONFIGURE > Secure Provisioning > Device Resources.
-
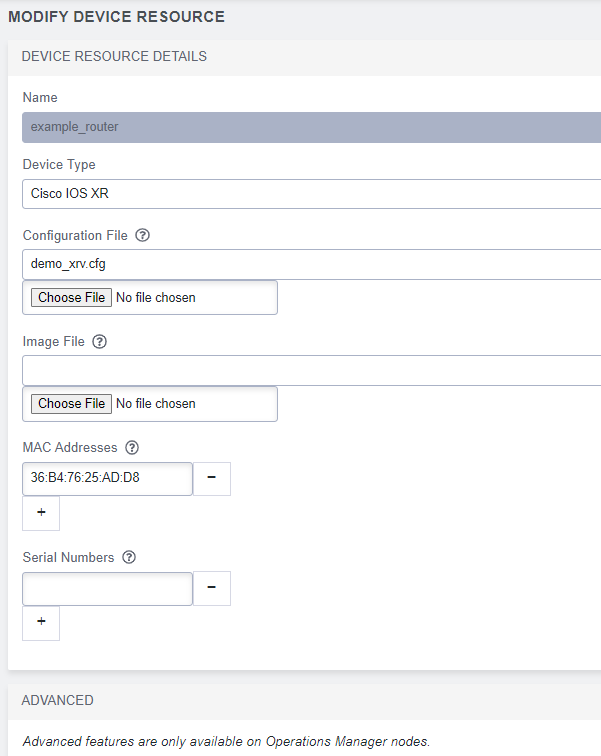
Click the Add (+) button. The Modify Device Resource page opens.
-
Choose a Name to identify this bundle, for example, demo_bundle1.
-
Select the Device Type corresponding to a target managed device.
Note:Each device type may display different resource fields documented below, this is dependent on the device-specific ZTP featureset
-
The Configuration File is the initial configuration file for the device to load via ZTP. Select a previously uploaded file or click the Browse button to upload a new file.
-
The Image File is the initial software image for the device loaded via ZTP. Select a previously uploaded Image File or click the Browse button to upload a new file.
-
Optionally, target this bundle at devices matching the specified MAC Addresses, click the Add and Remove buttons when specifying multiples.
Note:Each MAC address is specified in full, using a wildcard (for example, 00:10:FA:C2:BF:*), or negated to exclude from the match (for example, !01:23:45:67:89:AB)
-
Optionally, target this bundle at devices matching specified Serial Numbers, click the Add and Remove icons when specifying multiples.
-
Click Save.
DeFIne Resource Distribution
See the Node Inventory section earlier in this document for an overview of available distribution methods.
DeFine a Static Node Inventory
-
Navigate to CONFIGURE > Secure Provisioning > Resource Distribution.
-
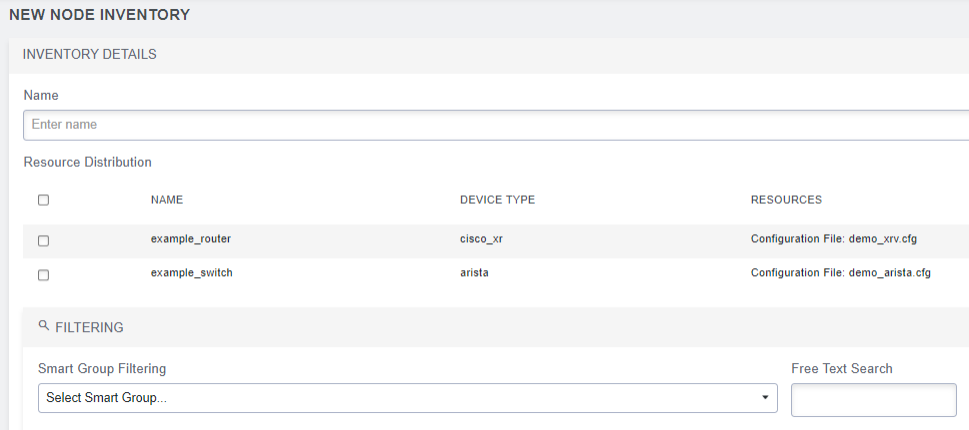
Under Static Node Inventory List click the Add + button. The New Node Inventory window opens, displaying inventory details.
-
Choose, and enter a Name to identify this bundle, for example, branchinventory_
-
From the Resource Distribution list, select the bundles to distribute.
-
Select the Nodes to which these bundles are to be distributed.
Note:The Free Text Search and Smart Group filter options are to help locate nodes for inclusion in the static inventory, these filters are not applied dynamically to the inventory going forward.
-
Click Apply.
/Netops-User-Guide-20Sept/Content/Resources/Images/New_Inventory_1.png)
DEFine a Dynamic Node Inventory
-
Create a Lighthouse Smart Group. See Creating Smart Groups
-
In the Lighthouse UI, navigate to CONFIGURE > Secure Provisioning > Resource Distribution.
-
Under Dynamic Node Inventory List click the Add + button. The Modify Node Inventory window opens, displaying inventory details.
-
Choose, and enter a Name to identify this bundle, for example, LabInventory_
-
Select the Smart Group to link to this inventory,
Note:this Smart Group search is dynamically evaluated to a list of nodes each time resources are pushed.
-
Select the bundles to distribute, listed in the Resource Distribution table.
-
Click Apply.
Note:Changes to resource bundle or distribution configuration are not applied to nodes immediately, they must be explicitly pushed to nodes.
Push Resources
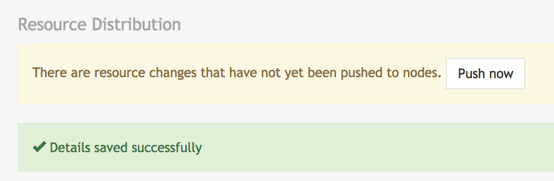
Any changes to the resource bundle or distribution configuration made in the previous steps are not applied to nodes immediately, they must be explicitly pushed to nodes.
When changes are detected, a Push now button is displayed above the Secure Provisioning UI pages.
Resources may always be resynchronized by clicking CONFIGURE > Secure Provisioning > Resource Distribution > Push Resources.
The push operation distributes resource bundles as configured, then as needed restarts DHCP services on remote nodes. Push status is displayed above the Secure Provisioning UI pages.
You may also monitor the syslog output on Lighthouse for low-level output from the Ansible playbook.