Adding external IP addresses manually
Adding a Lighthouse instance’s external IP address or addresses manually to a Lighthouse instance’s configuration is an optional step. In general, these should not be changed expect by a network support engineer. For more information on the network ports used by Lighthouse, see this link on the network architecture.
Note:IP addresses can be IPv4, IPv6 or DNS names.
To add a single external address:
-
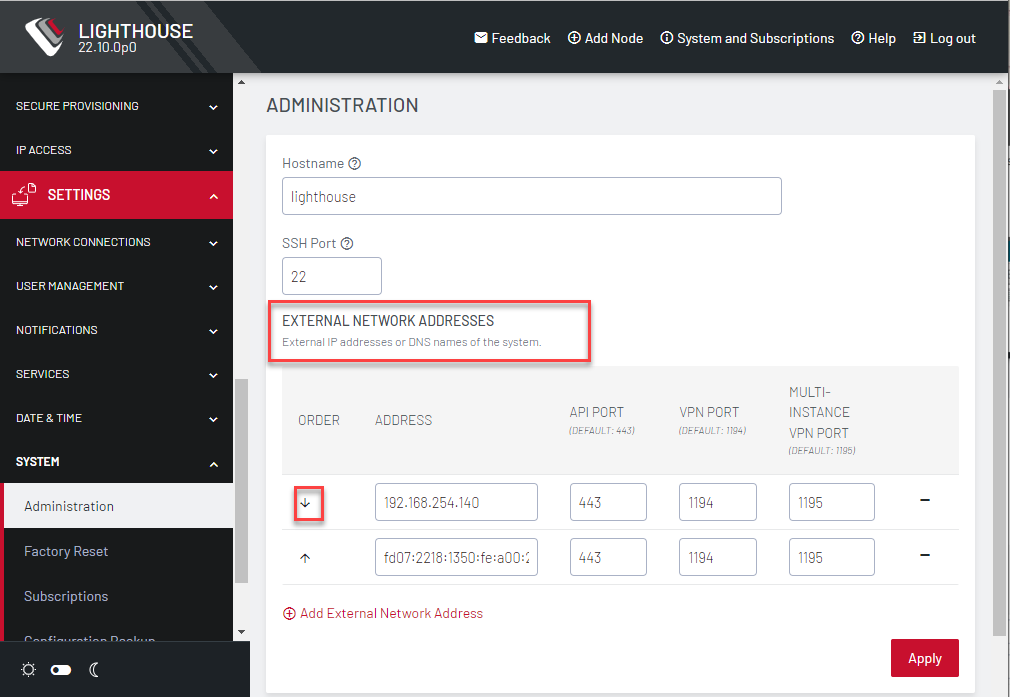
Select SETTINGS > SYSTEM > Administration.
-
In the Address field of the External Network Addresses section, enter an IP address or DNS name.
-
Change the API Port, VPN Port, or Multi-Instance VPN Port if the ports used on the entered IP address are different from the default settings.
-
Click Apply.
To add further external addresses to a Lighthouse instance’s configuration:
-
Click the + button. A second row displays in the External Network Addresses section.
-
In the Address field, enter an IP address.
-
Change the API Port, VPN Port, or Multi-Instance VPN Port if the ports used on the entered IP address are different from the default settings.
-
Click Apply.
To change the order in which manually added IP addresses are sent to remote nodes:
-
Click the up and down arrows in the Order column to change the order in which the IP addresses are listed.
-
Click Apply.
If external IP addresses are manually added to a Lighthouse configuration, these addresses are sent to a remote node during enrollment. If no external IP address is manually added, default external IP addresses are used.
The external IP addresses are sent to a remote node during Enrollment in the order configured on the SETTINGS > System > Administration page.