Enrollment via Lighthouse Web UI
Enrollment via Lighthouse Web UI only works if the Node is reachable from Lighthouse. To enroll a node:
-
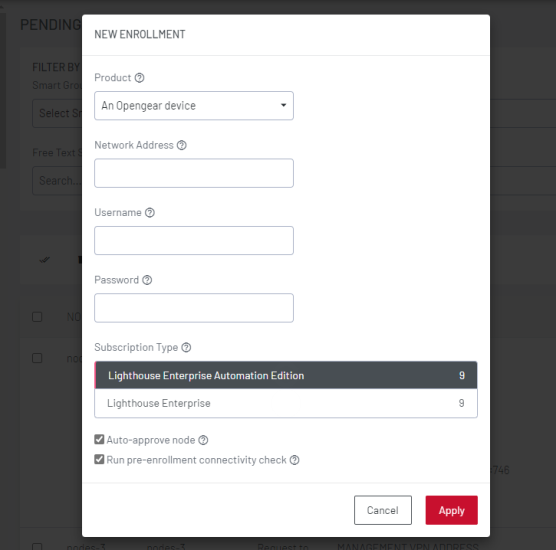
Select Add Node in the top menu bar to open a NEW Enrollment dialog.
-
Select the Product type from the Product menu:
-
An Opengear device.
-
A generic third-party device, see Note below.
-
An Avocent ACS6000.
-
An Avocent ACS8000.
-
An Avocent ACS Classic.
-
A Cisco 2900 Series.
-
A Digi Passport.
-
Enter the Network Address, Username, and Password of the node being enrolled. The Username and Password fields are for the login credentials required by the remote node being enrolled, not the login credentials used to login to the Lighthouse instance.
-
Select the Subscription Type. Each type shows the number of available subscriptions:
-
Enterprise Edition.
-
Automation Edition.
-
-
If required, you can also select the Auto-approve node and Run pre-enrollment connectivity checks.
-
Click Apply
Once enrolled, the console server’s details are removed from the Pending Nodes page and added to the CONFIGURE > NODE Enrollment > Enrolled Nodes page.