Import the Lighthouse VM Open Volume Format (.ovf) image
To import the Lighthouse VM:
-
From the vSphere Client menu bar, choose File > Deploy OVF Template.
The Deploy OVF Template window displays, with the first stage, Source, pre-selected.
-
If the file Opengear Lighthouse VM.ovf is on a remote computer via a URL, enter the URL in the Deploy from a file or URL field. Otherwise, click Browse. An Open dialog displays.
-
Navigate to the directory containing the file Opengear Lighthouse VM.ovf.
-
Select Opengear Lighthouse VM.ovf and click Open.
-
-
The Deploy OVF Template window opens again, with the Opengear Lighthouse VM.ovf file listed in the Deploy from a file or URL combo-box. Click Next.
-
The OVF Template Details stage displays, showing basic information about the Lighthouse VM encapsulated by the .ovf file. Click Next.
-
The Name and Location screen displays with the Name field pre-populated and pre-selected. The default name is Opengear Lighthouse VM. To change this, enter a new name. Click Next.
-
The Disk Format screen displays which data-store the Lighthouse VM’s virtual disk uses, how much free space the virtual disk has available and which provisioning scheme is being used. Click Next.
-
The Network Mapping screen shows which destination or inventory network the Lighthouse VM’s virtual network is mapped to. Click Next.
-
The Ready to Complete screen displays, listing the basic properties of the about-to-be-deployed virtual machine. To be able to power-up the new virtual machine after deployment, select the Power on after deployment checkbox. Click Finish.
-
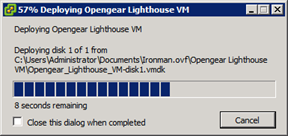
The Deploying Opengear Lighthouse VM progress dialog displays.
-
Once deployment has finished the Deployment Completed Successfully alert displays. Click Close.
The new virtual machine is now deployed and displays in the inventory list.