Import the VM Open Volume Format Image
To import the Lighthouse VM:
-
From the vSphere Client menu bar, choose File > Deploy OVF Template.
The Deploy OVF Template window displays, with the first stage, Source, pre-selected. -
If the file
Opengear Lighthouse VM.ovfis on a remote computer via a URL, enter the URL in the Deploy from a file or URL field. Otherwise, click Browse. An Open dialog displays.-
Navigate to the directory containing the file
Opengear Lighthouse VM.ovf. -
Select
Opengear Lighthouse VM.ovfand click Open.
-
-
The Deploy OVF Template window opens again, with the
Opengear Lighthouse VM.ovffile listed in the Deploy from a file or URL combo-box. Click Next. -
The OVF Template Details stage displays, showing basic information about the Lighthouse VM encapsulated by the
.ovffile. Click Next. -
The Name and Location screen displays with the Name field pre-populated and pre-selected. The default name is Opengear Lighthouse VM. To change this, enter a new name. Click Next.
-
The Disk Format screen displays which data-store the Lighthouse VM’s virtual disk uses, how much free space the virtual disk has available and which provisioning scheme is being used. Click Next.
-
The Network Mapping screen shows which destination or inventory network the Lighthouse VM’s virtual network is mapped to. Click Next.
-
The Ready to Complete screen displays, listing the basic properties of the about-to-be-deployed virtual machine. To be able to power-up the new virtual machine after deployment, select the Power on after deployment checkbox. Click Finish.
The Deploying Opengear Lighthouse VM progress dialog displays.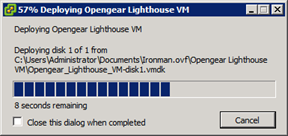
When deployment is finished, the Deployment Completed Successfully alert displays. -
Click Close.
The new virtual machine is now deployed and displays in the inventory list.