Configure Serial Ports
CONFIGURE > Serial Ports
Tip: Ensure you are on the CONFIGURE > Serial Ports page and not the similar ACCESS > Serial Ports page.
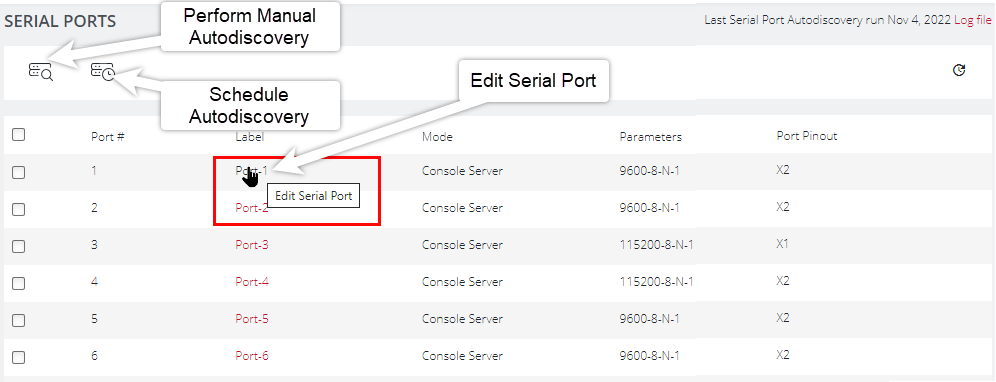
Navigate to CONFIGURE > Serial Ports; a list of serial ports is displayed. On this page you can configure and edit specific ports. Click the Edit button (pencil icon) to the right of the port to display the port editing page.
Edit Serial Ports
From the Configure > Serial Ports page, click the Port label text in the Label column. The Edit Serial Port page is displayed.
| Edit Serial Port Properties | ||
|---|---|---|
| Field | Options | Definition |
| Label | Default or Custom | The serial port unique identifier. This can be used to locate this port using the Quick Search form on the ACCESS > Serial Ports page. |
| Mode |
Disabled
|
Console Server mode allows access to a downstream device via its serial port.
Local Console mode allows access to the OM device’s console through a serial port. |
| Port Pinout | Cisco Rolled Cisco Straight |
Select pin-out type depending on the type of device or host to be connected via the port. |
| Baud Rate | Baud rate | Select the Baud rate expected for this port. From 50 to 230,400 bps. |
| Data Bits | Integer | The data bit length for character. |
| Parity | None, Odd, Even, Mark, Space. | The parity type for character. |
| Stop Bits | 1, 1.5, 2 | The Stop bit length used in character. |
| Escape Character | ~ | The character used for sending OOB Shell commands. |
| LOGGING SETTINGS | ||
| Logging Level | Disabled Events Only Events & Received Characters Events & All Characters |
Specify the level of detail you require in the logs. Logs may also be sent to a Syslog server. Other settings to consider are: "GLOBAL SERIAL PORT SETTINGS” under Services > Syslog. “Send Serial Port Logs” under Services > Syslog > Add Syslog Server |
| PORT IP ALIASES | ||
| IP Address | Alias IP Address and interface type. | Allocate an IP address for dedicated access to a specific serial port. |
Assigning unique IP addresses for each console port
Note:For further information about assigning unique IP addresses for each console port see the Zendesk article Assigning Unique IP Addresses For Each Console Port .
Configure Single Sessions for Ports
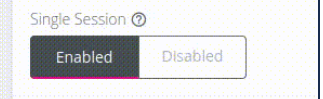
Single Session Port Config, or Single Session is a feature that can be enabled on a given port to prevent multiple users from connecting to that port or limit the port to a single concurrent connection. This feature is port-specific and is disabled by default. This feature needs to be enabled on a port-by-port basis. It can be enabled on all types of serial ports (including USB).
Similarly to config shell, a single session must be enabled/disabled on a port by port basis, currently it cannot be enabled on all ports.
Single Session Enabled
In the Web UI
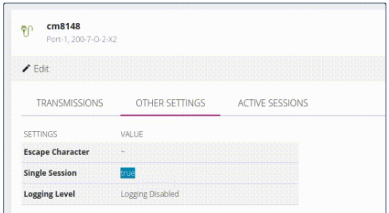
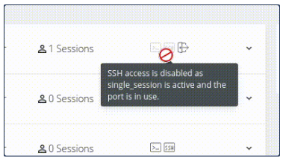
Single Session can be viewed and configured in the Web UI. It is enabled (or disabled) in the configure page for a given serial port. The buttons to connect to a serial port are automatically disabled when the feature is enabled and the session is in use.
You can also confirm the session in the access/serial_ports page, and also see if the feature is enabled.
When the Single Session feature is enabled and the port is in use, if a subsequent user attempts to connect to the port, the connection is declined and the second user will receive the message:
Unable to connect. Another session is currently active.
Please disconnect from the current session before attempting to connect again.
The pmshell will exit, and the user who tried to connect will not have seen the first user's session. Everything they have done will remain confidential.
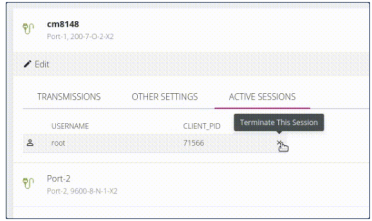
The single session is indicated next to the user
If necessary, a user's single session can be terminated with the Terminate all sessions button which is shown beside individual users. This will re-enable the Single Session button and allow you to connect.
In Config Shell
The Single Session feature can be enabled or disabled by editing the single_session field in a given port. When a user port level administration access is logged in via pmshell, the port configuration menu can be accessed via any port by pressing the escape character (~ by default) followed by c (~c).
You can access a port with the following commands, the following example will access “Port 1”:
config: port
config(port): port01
The port configuration might look like this below. You can see for this port, single_session is set to false, so the feature is disabled:
config(port port01): show
Entity port item port01
baudrate 9600
databits 8
escape_char ~
label Port-1
logging_level disabled
mode consoleServer
parity none
pinout X2
portnum 1
single_session false
stopbits 1
control_code (object)
break ""
chooser ""
pmhelp ""
portlog ""
power ""
quit ""
ip_alias (array)
The feature is enabled by typing single_session true, then apply the change.
config(port port01): single_session true
config(port port01): apply
Updating entity port item port01.
config(port port01): show
Entity port item port01
baudrate 9600
...
single_session true
...
ip_alias (array)
Single Session Behavior
The following table describes single session feature behavior in various circumstances.
| Q. | What occurs if users are connected to the port with the feature disabled, then the feature is enabled while users are still connected? |
| A. | Users who are already connected will continue to be able to use the port. If they leave, they will not be able to rejoin (unless there are no active sessions). Their current session will continue as normal, however, their session can be manually terminated from config shell (config(port_session):) or from the Web UI from the Access/Serial Ports page. |
| Q. | What if a user needs to be removed from a port? |
| A. | Administrators can remove the right for a given user to access a port. They can also manually remove them from the port in the config shell (config(port_session):) or the Web UI from the Access/Serial Ports page. |
| Q. | What if someone tries to join a port that is already in use? |
| A. | The user who tries to join will be prevented from doing so and receive a notification. The person currently using the port will be unaffected and not be aware of the attempt. |
| Q. | Is there a way to enable the feature for every port? |
| A. | Currently, the feature must be enabled/disabled on a port-by-port basis. |
|
Q. |
What if I enable this port on localConsole mode? |
|
A. |
The feature is ignored on local console mode and is only active for consoleServer mode. It also remains ignored if the port mode is set to disabled. |
Autodiscovery
The Autodiscovery feature attempts to discover the host name of connected devices, this uses the hostname of the device used to set the port label, so as to set it as the port label of each serial port. This can save the need to manually provide hostnames during setup.
Autodiscovery will attempt to discover port settings even if the hostname discovery fails. The first discovery run uses currently configured port settings such as the current baud rate, etc. Thereafter, it will fetch or use a single set of pre-configured credentials to login and discover the hostname from e.g. the OS prompt, for devices that do not display hostname pre-authentication.
Syslogging enhancement assists in the diagnosis of common issues (for example, no comms or, hostname failed validation). Autodiscovery does not collect a hostname when there is a communication issue between the console server and the target device. The logs are saved for the last-run instance of autodiscovery.
The UI displays error messages and logs with the reason for auto-discovery failure, for example:
-
Authentication failed.
-
Communication issue with the target device.
-
Password to renew before being able to authenticate to the target device.
-
Abnormal characters or strings detected.
Autodiscovery has been enhanced to discover baud rate and pinout (X1 / X2). The UI has been updated to indicate if ports are scheduled for discovery.
Note:The OM1208 will only discover X2 connections.
The Serial Ports page also allows you perform an Autodiscovery on selected ports. Autodiscovery of console ports attempts to set the port label by setting the baud rate to various rates (in the following order): 9600, 115200, 38400, 19200, and 57600.
Tip: Autodiscovery on other Baud rates may be done by manually running the port_discovery script from the Web Terminal.
Autodiscovery may be done manually by clicking Perform Autodiscovery.
Autodiscovery Enhancements
From the 22.11 release, the following parameter enhancements have been added to the port_discovery script which can be configured via the REST API or CLI:
-
--username and --password
-
--apply-config and --no-apply-config
-
--auth-timeout
-
--hostname-pattern
The --username and --password options can also be configured via the UI under Optional Credentials.
If the values are provided (optional), they will be used to attempt login to obtain the hostname to a downstream serial device. You can only specify a single username and/or password to try on all devices.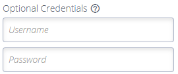
Cancel Autodiscovery
Port Autodiscovery may be canceled while running by clicking on the Cancel button at the top-right of the Serial Ports window of the UI. 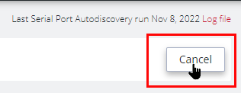
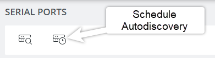
Schedule Autodiscovery
Autodiscovery can be scheduled periodically as required by clicking the Schedule Autodiscovery button in the Serial Ports window.
The Schedule Autodiscovery window allows you to select the ports and specify a time and period for port detection to run. Activate the schedule by clicking on the Enabled button.
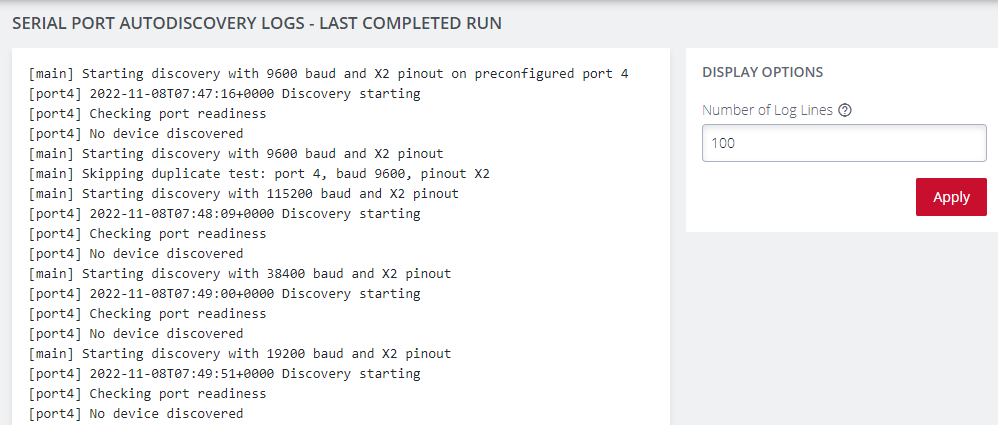
The Serial Port Autodiscovery Page: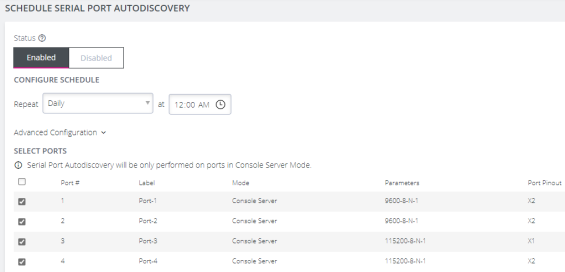
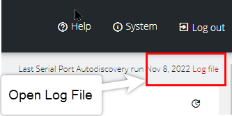
Retrieve Port Discovery Logs
At the top-right of the UI window, click on the Log File red text to retrieve the port discovery logs or by clicking on the View Logs red text in the autodiscovery running banner.

Port Discovery Log File Example: