Remote Authentication
The Operations Manager supports three AAA systems. Select the remote authentication mode to be applied (DownLocal, or Local apply for all modes):
Navigate to CONFIGURE > USER MANAGEMENT > Remote Authentication. The Remote Authentication Home page displays.
Tip: All fields in the Remote Authentication form have tooltips that provide additional information to assist with completing the form fields.
Configure RADIUS Authentication
-
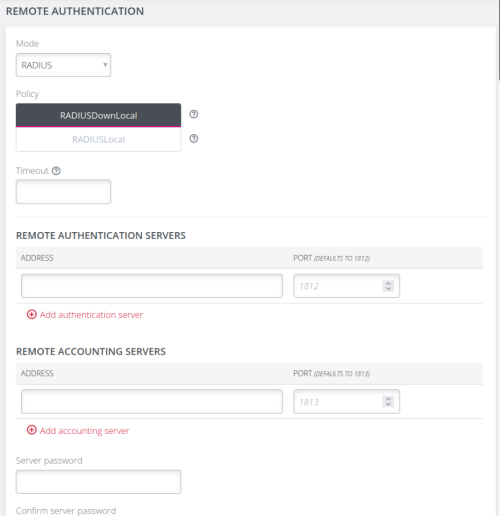
Under CONFIGURE > User Management > Remote Authentication, select RADIUS from the Mode drop-down menu.

-
Select the preferred Radius Remote Authentication policy to be applied:
-
Radius DownLocal: Users are authenticated through their local account only if the remote AAA server is unreachable or down. If the credentials provided at log in are incorrect or if the account does not exist on the remote server, the user is denied access.
-
Radius Local: If remote authentication fails because the user account does not exist on the remote AAA server, the OM attempts to authenticate the user using a local account as per a regular local log in.
-
-
Enter the authentication Timeout value to apply.
The timeout value specifies the number of seconds to wait for a response from the server before trying the next server.Note: The timeout value is global and applied to all authentication methods when you set the value on one authentication method.
-
Add the Address and optionally the Port of the authentication server.
-
Add the Address and optionally the Port of the RADIUS accounting server.
-
Select whether Message-Authenticator is required for server responses.
The default setting is Do not require Message-Authenticator. If the default setting is left, RADIUS responses may be subject to BlastRADIUS attack. -
Add and confirm the Server password, also known as the RADIUS Secret.
-
Select the preferred Radius Server Authentication method to apply.
Note: The method defaults to PAP if not configured. Ensure that the selected method is supported by the remote server.
-
Click Apply.
Note: Multiple servers can be added. The RADIUS subsystem will query them in a round-robin fashion.
To provide group membership, RADIUS must be configured to provide a list of group names via the Framed-Filter-Id attribute. The following configuration snippet shows how this can be configured for FreeRADIUS:
operator1 Auth-Type := System
Framed-Filter-ID = ":group_name=west_coast_admin,east_coast_user:"
Note: The Framed-Filter-ID attribute must be delimited by the colon character.
Configure TACACS+ Authentication
-
Under CONFIGURE > USER MANAGEMENT > Remote Authentication, select TACACS+ from the Mode drop-down menu.
-
Select the preferred TACACS+ Remote Authentication policy to be applied:
-
TACACS+ DownLocal: Users are authenticated through their local account only if the remote AAA server is unreachable or down. If the credentials provided at log in are incorrect or if the account does not exist on the remote server, the user is denied access.
-
TACACS+ Local: If remote authentication fails because the user account does not exist on the remote AAA server, the OM attempts to authenticate the user using a local account as per a regular local log in.
-
-
Enter the authentication Timeout value to apply.
The timeout value specifies the number of seconds to wait for a response from the server before trying the next server.Note: The timeout value is global and applied to all authentication methods when you set the value on one authentication method.
-
Add the Address and optionally the Port of the TACACS+ authentication server to query.
-
Select the Log in Method. PAP is the default method. However, if the server uses DES-encrypted passwords, select Login.
-
Add and confirm the Server password, also known as the TACACS+ Secret.
-
Add the Service. This determines the set of attributes sent back by the TACACS+ server
Note: Multiple servers can be added. The TACACS+ subsystem queries them in a round-robin fashion.
user = operator1 {
service = raccess {
groupname = west_coast_admin,east_cost_user
}
}
-
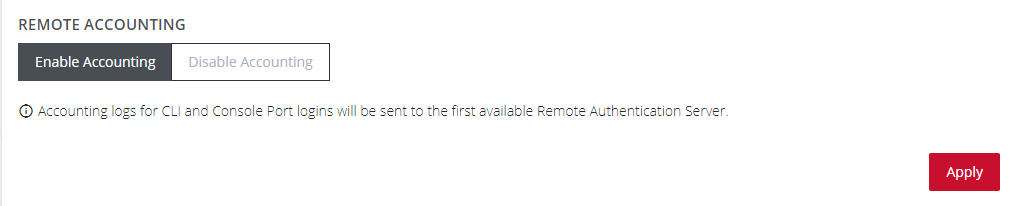
Enable or Disable Remote Accounting.
TACACS Accounting is enabled by default, the Remote Auth Server is used as the Accounting server. However, one or more Accounting Servers can be specified.-
To disable Remote Accounting, select Disable
-
To enable Remote Accounting, select Enable.
-
-
Click Apply.
Note: For Cisco ACS, see Setting up permissions with Cisco ACS 5 and TACACS+ on the Opengear Help Desk.
Configure LDAP Authentication
-
Under CONFIGURE > User Management > Remote Authentication, select LDAP from the Mode drop-down menu.
-
Select the preferred LDAP Remote Authentication policy to be applied:
-
LDAP DownLocal: Users are authenticated through their local account only if the remote AAA server is unreachable or down. If the credentials provided at log in are incorrect or if the account does not exist on the remote server, the user is denied access.
-
LDAP Local: If remote authentication fails because the user account does not exist on the remote AAA server, the OM will attempt to authenticate the user using a local account as per a regular local log in.
-
-
Enter the authentication Timeout value to apply.
The timeout value specifies the number of seconds to wait for a response from the server before trying the next server.Note: The timeout value is global and applied to all authentication methods when you set the value on one authentication method.
-
Add the Address and optionally the Port of the LDAP server to query. See LDAP and LDAPS Port Settings later in this topic.
-
Add the LDAP Base DN that corresponds to the LDAP system being queried. For example:
CN=example-user,CN=Users,DC=example-domain,DC=com
-
Add the LDAP Bind DN. This is the distinguished name of a user with privileges on the LDAP system to perform the lookups required for retrieving the username of the users, and a list of the groups they are members of.
-
Input the password for the LDAP Bind DN user and confirm the password.
-
Add the LDAP Username Attribute. This depends on the underlying LDAP system. Use sAMAccountName for Active Directory systems, and uid for OpenLDAP based systems.
-
Add the LDAP Group Membership Attribute. This is only required for Active Directory and is generally memberOf.
-
If required, check Ignore referrals option. When checked, LDAP will not follow referrals to other remote authentication servers when logging users in. If multiple remote authentication servers exist on the network, checking this option may improve log in times.
Note: Multiple servers can be added. The LDAP subsystem queries them in a round-robin fashion.
Configure LDAP over SSL
-
Complete the LDAP Authentication configuration as per Configure LDAP Authentication above.
-
At the SSL section of the LDAP page select the required server protocol:
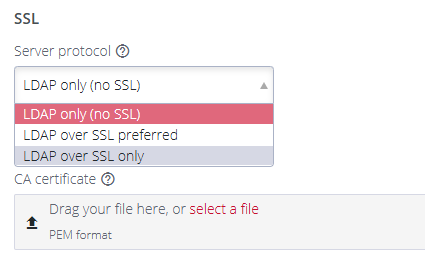
Note: The default setting is LDAP only.
Selecting 'LDAP over SSL uses the ldaps://server.
Selecting 'LDAP over SSL preferred' uses both ldaps://server and ldap://server.
-
Provide a CA Certificate by dragging the CA Cert file into the CA certificate drop box.
By default the LDAP server’s CA certificate is verified. -
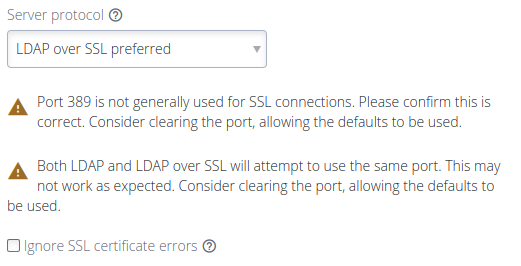
If a CA certificate is not provided, certificate verification can be disabled by selecting the Ignore SSL certificate errors checkbox.
Note: Ignore SSL Certificate Errors also prevents some other SSL-related certificate errors.
A warning displays if no CA Certificate is present and the Ignore SSL certificate errors checkbox is not selected. In this case no LDAP server certificates are considered valid:

Note: The CA Certificate filename is correct when the certificate is initially uploaded. The filename is not maintained or stored, if the page is later revisited the filename is always shown as “cacert.pem”.
Click Apply to load and apply your settings.
LDAP and LDAPS Port Settings
The default ports for LDAP and LDAPS are:
LDAP: Port 389
LDAPS: Port 636

Port selection warning messages:
-
If port 389 has been set and LDAP over SSL is enabled, a warning is shown.
-
If any port has been set and LDAP over SSL is preferred, a warning is shown.
-
Setting LDAP over SSL preferred and port 389 results in both warnings being shown.
See the warning messages below:
Limitations for LDAPS Implementation
Previously, the port for LDAP servers had a default value. When upgrading, this port is not cleared. When enabling LDAP over SSL, it may be necessary to clear the port so that the LDAP over SSL default port can be used.