System Upgrade
You can perform a system upgrade when new firmware is released. After specifying the location of the firmware and beginning the upgrade process, the system is unavailable for several minutes and then reboots. Unlike a factory reset, users, and other configuration data is maintained after the upgrade.
Perform a System Upgrade VIA WEBUI
-
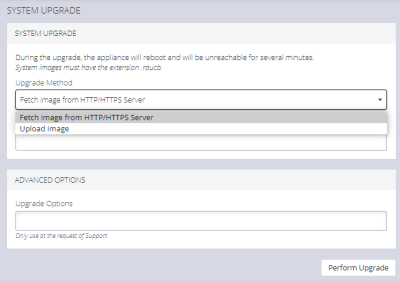
Navigate to the CONFIGURE > System > System Upgrade page.
-
Select the Upgrade Method, either Fetch image from HTTP/HTTPS Server or Upload Image.
Note: See https://opengear.com/support/device-updates/ for firmware updates.
Upgrade via Fetch From Server
If upgrading via Fetch image from HTTP/HTTPS Server:
-
Enter the URL for the system image in the Image URL text-entry field.
-
Click Perform Upgrade.
Upgrade via Upload
If upgrading via Upload Image:
-
Click the Choose file button.
-
Navigate to the directory containing the file.
-
Select the file and press Return.
-
Click Perform Upgrade.
Note: The Advanced Options section should only be used if a system upgrade is being performed as part of an Opengear Support call.
When the upgrade has started, the System Upgrade page displays feedback as to the state of the process.
Perform a System Upgrade via CLI
-
Log in to the CLI as an administrator or root user.
-
Use one of the following methods to perform the upgrade:
-
Load an raucb file from a remote URL:
sudo puginstall --reboot-after https://ftp.opengear.com/download/opengear_appliances/OM/current/operations_manager-YY.Qn-public.raucb
-
Copy the raucb file to the Operation Manager's /tmp directory using scp, WinScp or similar, then load the local file:
sudo puginstall --reboot-after /tmp/operations_manager-YY.Qn-public.raucb
The Operations Manager writes the upgrade to its storage and reboots. This may take a few minutes.
-
Note: To check the version before or after the upgrade, run cat /etc/version.