Node Details Page
To open this page, go to the:
-
Nodes page, then on the ENROLLED tab, click the Node Name in the table.
-
Dashboard page, then on the CONNECTED tab, click the Node Name in the table.
PORTS tab
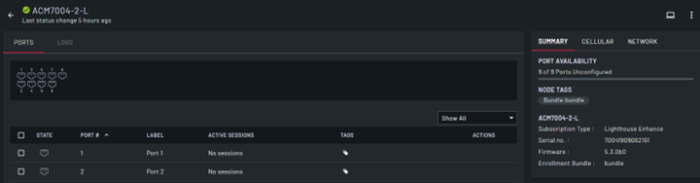
| Action | Description |
|---|---|
| Ports | Displays all the configured and unconfigured ports on the node. Configured ports display green. |
| Filter | Click and select a port filter to apply. |
| Terminate Selected Sessions |
Click this to terminate the sessions for the selected ports. When the CONFIRM SESSION(S) TERMINATION dialog displays, click Confirm. This button is available only when at least one port is selected. |
| Tag Selected | Click this to add tags to the selected ports. This button is available only when at least one port is selected. |
| Select | Select the check box next to the port(s). When selected, the Terminate Selected Sessions and Tag Selected buttons are available. |
| State | Displays an icon that indicates whether the port is configured. Configured ports display green. |
| Port # | Read-only field that displays the port number. |
| Label | Read only field that displays the port label. |
| Active Sessions | Read-only field that displays active user sessions on that port. |
| Tags | The tags associated with the port. Click  to add or edit node tags. to add or edit node tags. |
| Actions |
Select from the following actions:
|
| Node Details Panel |
An information panel that displays with the following tabs:
|
| Configuration profile | Displays the configuration profile associated with the node and the commit status: Pending, In progress, or Committed. |
 to access the node UI through Lighthouse.
 to open the SSH client and SSH into the node, if you have an SSH client configured.
 to
to